Tuesday, December 20, 2016

Collected Cajon Lessons


I'm interested in buying a cajon, so started looking at some playing online and lessons provided. Here are some interesting links. If anybody else has great links, please comment on this post. Happy to make this overview an broad collection of tutorials.


Players


Roland TD-6 with reduced footprint

I've been owning a standard Roland V-Drum TD-6 for quite some time now. I bought it on a sale, probably around 15 years back, as a compact set that I could put next to my home office desk to play whenever I wanted. And although this set, and specifically the TD-6 module, is very much outdated by now, the kit does what it needs to do. It provides me with a practice kit, that I can keep close at hand, and on which I can play any time of day without needing to worry about neighbors, sleeping kids, or studying/working partners.


However, even though this set is relatively compact, the wide arms reaching out left, as well as the legs sticking out, make that this kits still takes more space than I think it should. (I like to keep my office nice and tidy, so every square foot of space saved just makes me feel better). So when in 2014 Roland 
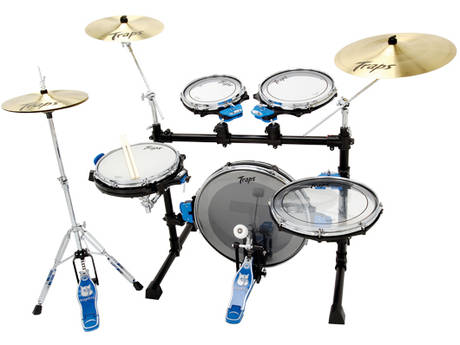
released a new model, specifically aimed at being as compact as possible, namely the TD-1K, shown below, I started thinking about how I could make my TD-6's footprint as small as possible. So here is how I reorganized my TD6 in order to make it as compact as possible. 


Firstly I took the frames apart and created 1 vertical frame on which I wanted to attach everything, supported by 1 foot in front of that frame to create a triangular base to make the construction stand solid, as shown here (In my very primitive sketch).


That turned out not too difficult although I ended being short on 1 side of the triangle.


After adding the pads back on this is what the set looks like.


The final result is pretty compact setup for now in which I do have some pieces left over.


Good things about the current setup are
  • very compact
  • very stable (especially under the snare, the solid feel makes a difference)
  • wires are now mostly all behind the frame, which makes things nice and clean.
Overall, I'm pretty happy with the end result having reduced the footprint of my kick drastically.


On a side note, there also some things I still want to tweak over the next days and weeks although the have nothing to do with the footprint of the set.

Firstly there is the kick pad. I'm not a fan of the original construct for the bass drum that came with the TD-6 namely the KD7. I don't like it for several reasons
  • The beater that kicks backwards (or rather downwards), just does not feel natural for me. You just seem to feel that you are kicking in the wrong direction. 
  • Additionally, the rebound of the KD7 just does not feel natural
  • And finally the pedal stands loose on the ground. Agreed, it has pins that keep it in place, but still, if feels wrong.


The hi-hat control pedal is something I'm not happy with either, but that has nothing to do with making the set-up compact. The pedal has never been too responsive. I think that needs some  research. (Or maybe just take out the dust that accumulated over the years).

I sacrificed a tom pad, and while I usually always play with just two toms, I'd still like to see how, if I can find a proper use for that pad. 

Finally, the TD-6 module has a remaining input that is left unused (the kit was sold like that), so I would like to figure out if I can put it to use somehow.

Maybe topics for a next post.


Sunday, April 1, 2012

Tromsa Kombination M4

This week I made a new addition to my drum collection. I got my hands on an old Tromsa drum from the end of 1960's or beginning 1970's. It looks like a model "Kombination M4".  Anyone has more information on the origin of this set, please post me a comment.

Here's some pictures.


Sources:

  • http://home.arcor.de/pfaue/tromsa/katalog/kataloge.htm
  • http://www.vintagedrumforum.com/showthread.php?t=8591
  • http://www.youtube.com/watch?v=j8uC8D1afkA

Sunday, March 18, 2012

Brush technique


Looking for some extra info on how to use brushes, I ran into some great YouTube video's. I decided to add it all into a comprehensive overview of available learning resources and some stunning examples on brush technique. All in all, I believe the below material provides you with several months, if not years of learning. Enjoy!

Peter Erskin on the Vic Firth Education Resource Center
To start with, here's a series of 6 YouTube video's, by my compatriot Peter Erskine (as featured on the Vic Firth Education Resource Center)
  1. Developing a legato sound
  2. Articulation
  3. Basic Time Patterns
  4. Time keeping
  5. Bossa / Pop Grooves
  6. Medium/Fast Jazz
Below video collection will launch all 6 of them in a row.


The art of Brushes
Next, a series of excerpts from the DVD "The art of brushes" (as available on YouTube), featuring:
To view all excerpts in a row, use the below YouTube collection.


Stefan Bagnoli
Stefano Bagnoli at the Drum Brother Project


Clayton Cameron
Clayton is the author of the great book "Brushworks: The new language for Playing Brushes". I happen to be the owner of the book and can confirm that it's worth the money.

Below YouTube materials show the brush master in action on some drum shows. No comment!


Florian Alexandru-Zorn
Florian Alexandru-Zorn seems to be one of the new kids on the block. He released the book "The Complete Guide to Playing Brushes" as well as more recently the 2DVD "The Brush Secret". Some of the materials of the DVD are available through the website of the "The Bush Secret", and are also featured on the Evan's website.

Evans website
The Evans drumheads website has some great video's by:
Some other resources

Monday, February 20, 2012

Portable recykit, part 1: refinishing

Sometime back I ran into a nice article about refinishing a drum on instructables.com. I gave me the idea to (finally) clean up these two "drum sets" I had sitting in my garage. The idea was to give them the same look and merge them into one (very versatile) kit.
  • The first set is an old drum of which I don't even remember the origins. I really liked to orange wrapping, but it was in a really bad state. I did do some digging, and it turned out to be a 1950's Tromsa drum, "Kombinationen 511", very similar to this model, shown on a very complete website on the Tromsa drums.
  • The second set is something I put together 4 years back in order to have a very small portable kit. Obviously, I still want to keep that option, but it seemed to me that the 14" tenor could serve it's normal role when added to the orange set. Crazy enough, while researching the above kit from Tromsa, I discovered that this tenor drum, most likely came out of the same factories.

This blog post describes shortly my experience with refurbishing this old "junk" while keeping the cost of the whole experiment as low as possible. In the end I've done a bit more than just refurbishing the shells, but please, read on.

Part 1: Refurbishing the shells
I decided to perform a test run on the 12" tom of the orange set. I ripped off the cover and unscrewed all the hardware pieces. I filled any holes in the shell with wood putty. In order to stay on a budget, I used whatever I had left on the shelf. Clearly a bit to dark for these shells, but I figured the stain would hide most of the difference. (Turns out it didn't, and even worse the stain didn't attach on the putty as it did on the wood.)


Once that had hardened, I sanded the outside of the shell. I used a small hand machine with sanding paper 200.
 

After the sanding it needed some serious dusting off. I order to make sure I got all the dust, I first brushed it up and then I took a slightly humid cloth and cleaned the shell. I repeated that a couple of times until I was sure all the dust was off and the shell was ready for painting.

Next step was actually starting to apply the stain. I just used a brush and tried to apply the stain as equally as I could. After a first treatment with green stain, the drum looked like this. (Shell and remounted.)


I'm not sure whether the result of the staining was so 'unequal' because of my lack of technique, or because of the quality of the wood, any remains of glue, or anything else. Even though it might not show on these picture, I thought a second treatment would be appropriate. You'll see the result below.

In the meantime, I had treated all the hardware of the tom, with metal cleaner, so it was all shiny again. Before mounting the drum again, I decided to add some muffling to all the screws. I don't like rattling pieces in my set, so I decided to make sure that wouldn't happen. My wife likes the house to stay clean, and in front of the door that leads up to the house, she always puts a floorcloth. Now this floorcloth seemed to be made of something felt-like which could easily be cut. I cut of a large piece (2 cm wide the whole side), and used that to create the "mufflers" for the screws. (Up to today I don't know if my wife noticed the floorcloth got smaller.)


To muffle the tom mount, I cut out a piece of a mousepad. Mousepads are freely available on the planet earth. Websites as freepage.be or gratis.nl will help you locate your "donor".


When applying the second layer, I put the stain on a bit too thick. As a result, I found the green a bit to dominant and unfortunately the (grain of the) wood wasn't 'shining' through anymore. Still the option with the second layer was better than just a single layer. With the second layer of stain on the shell, and the clean hardware remounted, this is what the tom looked like.


While I was in doubt of applying a layer of transparent coating to protect the shell, I decided finally not to add the coating. The stain itself already hade a nice shine to it and while I intend to carry this kit around to all possible places, I also plan to take care of it.

All in all, not such a bad result, so I went ahead with the rest of the kit. The results you can see in part 2 of this post.


Sources:
  • http://www.acousticdrums.com/members/refinish.html
  • http://jpyh.net/photo/refinish/
  • http://www.instructables.com/id/How-to-refinish-a-drum/
  • http://www.pearldrummersforum.com/showthread.php?91346-Refinishing-drums-My-attempt-and-Step-By-Step-Instructions
  • http://www.youtube.com/watch?v=jL4luB2gjhs
  • http://members.westnet.com.au/freobonsai/


Monday, February 13, 2012

About compact portable drum kits

Methods
How can you make drum kits more compact? The size of the drum seems to be determinant for its sound and volume so how can effectively reduce the size without loosing quality or quantity of sound? Here's some of the methods that are used most often to create compact drums.

Nesting
Yamaha Hipgig
Drums are hollow. And typically the different drum shells in a kit come in different sizing. So a first way of making your drum set more compact for transportation, that easily springs to mind, is by making sure you can nest the shells. This works very much like the famous russian dolls (Matryoshka) which can all fit into one another. This technique obviously has some downsides. Somehow you need to ensure you can open up the drum shells, which means that either the shell exists out of 2 pieces (something that will surely have some impact on the resonance of the shell), or you need to figure out a mechanism for easily removable heads (), or just use use single headed shells (which clearly affects the drum sound).


So, nesting drums for transport is a great technique for reducing the volume you need to carry around. But it doesn't reduce the amount of weight you carry around. So while a nested drum might be the solution for the drummer with the small car, it surely doesn't help the drummer that needs to cary his kit across town using the metro, tram or bus lines. He needs compact and light drums

Smaller drum sizes
Another evident technique to make your kit compact is using smaller drums. Some drummers love a 24" bass drum. But when looking for a transportable solution, maybe an 18" or even 16" alternative might do the trick. The same applies for the toms and snare. So if a standard drum kit would typically be 12", 13", 16" and 22" with at 14" snare, you'll notice many of the compact drum sets to have a 10", 13", 16"/18" set-up, with a 13" snare. Obviously that reduces weight as well as size.

Clearly a drum set with such small sizes will not easily give you that solid John Bonham sound, but that's the price you pay.
Premier Artist Heritage
Traps A400


Reduced depth
Reducing the depth of the shells is another way of making the drum set more compact. In some kits, as the Traps A400 kit, this is done to the extreme, leaving on the heads, no shell. While the people at Traps claim that 80% of the sound of the drum, comes from the head, I have my doubts about this statement. Even taking the second head of a normal drum, immediately alters the sound. And the depth of the shell surely matters. Still, the Traps A400 gets good reviews.

Lighter drums and hardware
While acoustic drums are typically made out of maple, mahogany or birch, it comes at no surprise that the portable drum sets are made of mahogany, the wood type with the lowest density of these three.


But the greatest reduction is probably to be gained in the hardware. By mounting cymbals and toms on top of the bass drum, or by mounting multiple parts of the set on one stand, a great weight reduction can be achieved.
Gigpig


Reduced or alternative set-up
The last obvious trick to reduce weight and make the kit more compact, is by using less material. Use 1 or 2 instead of the typical 3 toms, 2 cymbals, not 7, 1 bass drum not 2. But that's the first trick any drummer discovers. However you can go a step further with this concept. The cocktail drum is the probably the best and oldest example of such a reduced and alternative set-up. But recently other alternatives as the gigpig or the suitcase drum have surfaced.


Kits
Here's an overview of some kits that are out there.


Sources:

Blorganization

Just for the record, I'll be using the following tags on my blog:

  • Drimformation: General information on drums
  • Drum lessons: Interesting grooves, links to lessons, video's and books
  • Do it yourself: Build your own drum and percussion materials
  • My Gear: The stuff I play on