Monday, February 20, 2012

Portable recykit, part 1: refinishing

Sometime back I ran into a nice article about refinishing a drum on instructables.com. I gave me the idea to (finally) clean up these two "drum sets" I had sitting in my garage. The idea was to give them the same look and merge them into one (very versatile) kit.
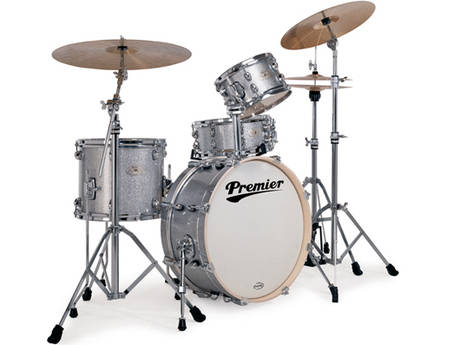
  • The first set is an old drum of which I don't even remember the origins. I really liked to orange wrapping, but it was in a really bad state. I did do some digging, and it turned out to be a 1950's Tromsa drum, "Kombinationen 511", very similar to this model, shown on a very complete website on the Tromsa drums.
  • The second set is something I put together 4 years back in order to have a very small portable kit. Obviously, I still want to keep that option, but it seemed to me that the 14" tenor could serve it's normal role when added to the orange set. Crazy enough, while researching the above kit from Tromsa, I discovered that this tenor drum, most likely came out of the same factories.

This blog post describes shortly my experience with refurbishing this old "junk" while keeping the cost of the whole experiment as low as possible. In the end I've done a bit more than just refurbishing the shells, but please, read on.

Part 1: Refurbishing the shells
I decided to perform a test run on the 12" tom of the orange set. I ripped off the cover and unscrewed all the hardware pieces. I filled any holes in the shell with wood putty. In order to stay on a budget, I used whatever I had left on the shelf. Clearly a bit to dark for these shells, but I figured the stain would hide most of the difference. (Turns out it didn't, and even worse the stain didn't attach on the putty as it did on the wood.)


Once that had hardened, I sanded the outside of the shell. I used a small hand machine with sanding paper 200.
 

After the sanding it needed some serious dusting off. I order to make sure I got all the dust, I first brushed it up and then I took a slightly humid cloth and cleaned the shell. I repeated that a couple of times until I was sure all the dust was off and the shell was ready for painting.

Next step was actually starting to apply the stain. I just used a brush and tried to apply the stain as equally as I could. After a first treatment with green stain, the drum looked like this. (Shell and remounted.)


I'm not sure whether the result of the staining was so 'unequal' because of my lack of technique, or because of the quality of the wood, any remains of glue, or anything else. Even though it might not show on these picture, I thought a second treatment would be appropriate. You'll see the result below.

In the meantime, I had treated all the hardware of the tom, with metal cleaner, so it was all shiny again. Before mounting the drum again, I decided to add some muffling to all the screws. I don't like rattling pieces in my set, so I decided to make sure that wouldn't happen. My wife likes the house to stay clean, and in front of the door that leads up to the house, she always puts a floorcloth. Now this floorcloth seemed to be made of something felt-like which could easily be cut. I cut of a large piece (2 cm wide the whole side), and used that to create the "mufflers" for the screws. (Up to today I don't know if my wife noticed the floorcloth got smaller.)


To muffle the tom mount, I cut out a piece of a mousepad. Mousepads are freely available on the planet earth. Websites as freepage.be or gratis.nl will help you locate your "donor".


When applying the second layer, I put the stain on a bit too thick. As a result, I found the green a bit to dominant and unfortunately the (grain of the) wood wasn't 'shining' through anymore. Still the option with the second layer was better than just a single layer. With the second layer of stain on the shell, and the clean hardware remounted, this is what the tom looked like.


While I was in doubt of applying a layer of transparent coating to protect the shell, I decided finally not to add the coating. The stain itself already hade a nice shine to it and while I intend to carry this kit around to all possible places, I also plan to take care of it.

All in all, not such a bad result, so I went ahead with the rest of the kit. The results you can see in part 2 of this post.


Sources:
  • http://www.acousticdrums.com/members/refinish.html
  • http://jpyh.net/photo/refinish/
  • http://www.instructables.com/id/How-to-refinish-a-drum/
  • http://www.pearldrummersforum.com/showthread.php?91346-Refinishing-drums-My-attempt-and-Step-By-Step-Instructions
  • http://www.youtube.com/watch?v=jL4luB2gjhs
  • http://members.westnet.com.au/freobonsai/


Monday, February 13, 2012

About compact portable drum kits

Methods
How can you make drum kits more compact? The size of the drum seems to be determinant for its sound and volume so how can effectively reduce the size without loosing quality or quantity of sound? Here's some of the methods that are used most often to create compact drums.

Nesting
Yamaha Hipgig
Drums are hollow. And typically the different drum shells in a kit come in different sizing. So a first way of making your drum set more compact for transportation, that easily springs to mind, is by making sure you can nest the shells. This works very much like the famous russian dolls (Matryoshka) which can all fit into one another. This technique obviously has some downsides. Somehow you need to ensure you can open up the drum shells, which means that either the shell exists out of 2 pieces (something that will surely have some impact on the resonance of the shell), or you need to figure out a mechanism for easily removable heads (), or just use use single headed shells (which clearly affects the drum sound).


So, nesting drums for transport is a great technique for reducing the volume you need to carry around. But it doesn't reduce the amount of weight you carry around. So while a nested drum might be the solution for the drummer with the small car, it surely doesn't help the drummer that needs to cary his kit across town using the metro, tram or bus lines. He needs compact and light drums

Smaller drum sizes
Another evident technique to make your kit compact is using smaller drums. Some drummers love a 24" bass drum. But when looking for a transportable solution, maybe an 18" or even 16" alternative might do the trick. The same applies for the toms and snare. So if a standard drum kit would typically be 12", 13", 16" and 22" with at 14" snare, you'll notice many of the compact drum sets to have a 10", 13", 16"/18" set-up, with a 13" snare. Obviously that reduces weight as well as size.

Clearly a drum set with such small sizes will not easily give you that solid John Bonham sound, but that's the price you pay.
Premier Artist Heritage
Traps A400


Reduced depth
Reducing the depth of the shells is another way of making the drum set more compact. In some kits, as the Traps A400 kit, this is done to the extreme, leaving on the heads, no shell. While the people at Traps claim that 80% of the sound of the drum, comes from the head, I have my doubts about this statement. Even taking the second head of a normal drum, immediately alters the sound. And the depth of the shell surely matters. Still, the Traps A400 gets good reviews.

Lighter drums and hardware
While acoustic drums are typically made out of maple, mahogany or birch, it comes at no surprise that the portable drum sets are made of mahogany, the wood type with the lowest density of these three.


But the greatest reduction is probably to be gained in the hardware. By mounting cymbals and toms on top of the bass drum, or by mounting multiple parts of the set on one stand, a great weight reduction can be achieved.
Gigpig


Reduced or alternative set-up
The last obvious trick to reduce weight and make the kit more compact, is by using less material. Use 1 or 2 instead of the typical 3 toms, 2 cymbals, not 7, 1 bass drum not 2. But that's the first trick any drummer discovers. However you can go a step further with this concept. The cocktail drum is the probably the best and oldest example of such a reduced and alternative set-up. But recently other alternatives as the gigpig or the suitcase drum have surfaced.


Kits
Here's an overview of some kits that are out there.


Sources:

Blorganization

Just for the record, I'll be using the following tags on my blog:

  • Drimformation: General information on drums
  • Drum lessons: Interesting grooves, links to lessons, video's and books
  • Do it yourself: Build your own drum and percussion materials
  • My Gear: The stuff I play on

Sunday, February 12, 2012

Suitcase drums

I've spend quite a lot of time looking for portable drum set. I guess it's logical for drummers to do so. If you are a very active drummer and need to move around a lot from rehearsal to rehearsal or gig to gig, you can develop a serious hernia carrying around those double bass drums (if that's your style).

Over the years I found a lot of great ideas (both commercial and do-it-yourself) on the subject of portable drums, including the Yamaha hipgig sets, jungle drums, cocktail drums, the Pearl rhythm traveler, and of course the great and friendly advice of many to just go electronic or plainly use a drum computer.

While looking around on the topic of extremely portable drum sets, I ran into the suitcase drum, a drum set that fits into a suitcase and where the suitcase functions as the bass drum. I believe so far this is the most original and most inexpensive idea I have ran into, so I've added some details here.


Mike Reetz, who seems to be the guy who came up with this, has written an extensive tutorial on the topic and has posted this YouTube video explaining where his idea came from.


It seems a whole list of people have actually made their own, including:
So, yet another topic on my "do it yourself drum" list.

Wednesday, February 8, 2012

My portable and compact practice and travel kit

This is my portable and compact travel kit.

Composed of:

  • 14" tenor drum (marching band left-overs) on which I mounted two legs
  • 10" snare attached to the hi-hat stand
  • Tama Iron Cobra hi-hat stand
  • Tama Iron Cobra bass drum pedal


All the junk in the world

The fact is that over the years I've "collected" (read: picked up) a lot of second hand drum and percussion materials. The objective has always been to "make something out of nothing".

I've added some pictures to illustrate what types of junk I'm talking about.

Children's drum set. Picked it up for 25€(?) of so about 4-5 years back. It's a 20" BD with a single 12" tom and a 13" snare. BD and tom sound pretty good. The snare is utter crap. There's no single sign of what brand this is. Any one who's every seen something like this and can shed some light on the origins of this thing, please add a comment to this page or contact me.


Some left-overs from the marching band in my home town. A huge 2?" "bass-drum", a 14" deep tenor and a 13,5" used-to be snare.  (You cannot see the original shape of tenor and snare any more as transformed the 14" tenor into a mini bass-drum that I use together with a 10" snare as compact practice and travel kit.) This pile of drums also came with a 20" Zildjian Cymbal.


So I hope to show in my next posts, what I'm able to make out of this junk.

Monday, February 6, 2012

Protect us from all rhythmic deviations ...

Boinktaboomski, patron saint of poly-rhythmics, protector of rare percussion instruments, founder of the church of rhythmology, heavenly off-beat advocate, guardian angel of the ghost-note and sanctified icon of the flam, I call upon you to watch over this blog. May it grow out to be the testimony of all rhythmic escapades I undertake with your divine blessings. For years I have dwelled in the realms of drummers and percussionist, without spreading thy message. Gone gone gone those times of ignorance. Every step I take on the path to rhythmic salvation, from now on will be posted here, as a guidance for he generations to come.